This blog post, written by me (Beatrice) and my teammate (Jasmine), outlines the filming process for our Component 3 Music Video. It includes behind-the-scenes images accompanied by detailed descriptions of the challenges we faced each day, the solutions we implemented to address them, and the steps we took to make improvements throughout the filming process.
Group Roles
Me (Beatrice) : Cameraman, Director
Jasmine : Actress, Cameraman
Rachelle : Actress
Additional Roles
Jocy and Cheryl : Cameraman
The turquoise text on the timeline signifies that the behind the scenes is written by Jasmine, while the pink text indicates those written by me (Beatrice).
Day 1 - 26 December 2024 (written by Jasmine)
I tried to record on my own with a friend who is not in my project group (Jocelyn) as the rest of my group mates were all busy for the rest of the year and we wouldn’t be able to record then. I attempted to record a scene for the first part of the song and tried to practice my lip syncing but I think especially because this was my first time doing something like this, it definitely came out stiff. I don’t think I’ll be using this clip especially since it doesn’t fit the narrative, but I just wanted to try and get some filler clips just in case.
Here was me trying to figure out how my tripod would work since I just got it. I got help from my friend, Jocelyn.
Day 2 - 14 January 2025 (written by me)
This marked the first day of our filming process. We are really far behind the schedule, as my teammate, Rachelle, has been busy with family and formal events. On this day, we filmed the scenes at Rachelle's house after school. Initially, we planned to film at two locations—Sanur Beach and Rachelle's house. However, due to the rain, we couldn’t proceed with filming at the beach. Additionally, we started filming later than expected because traffic caused delays, which prevented us from arriving on time.
As Rachelle and Jasmine prepared and did their touch-ups, I (Beatrice) took behind-the-scene pictures.
Filming Setup
As Jasmine filmed Rachelle's scene, I helped by managing the timing of the music to ensure that it started and ended as needed. This argument scene was suggested by our teacher, Mr. Nick, to clearly show that the narrative of two best friends falling out. I observed the filming process to gain a better understanding on how to operate the camera, so I can contribute to filming in future scenes.
I then took over filming for Jasmine's scene.
Towards the end of filming, we decided to re-take Rachelle's scene from a different angle to compare and determine which angle suited the scene better.
Fortunately, the scenes were short in duration, allowing us to complete the filming at Rachelle's house without many issues, aside from the delays and rainy weather.
Day 3 - 22 January 2025
Initially, since this was a school scene, our plan was to film right after school. However, because our last subjects were different, it took some time for us to find each other and gather for filming. We also needed to find an empty classroom with a suitable layout to make filming easier. Once we found the right classroom, our friend, Jocy, lent us her gimbal for the shoot. Since I had never used a gimbal before, Jocy had to demonstrate how to operate it.
Jasmine and Jocy worked on setting up the camera and adjusting the gimbal.
While Jasmine was drawing Rachelle, Rachelle and I tested the camera to determine which angle worked best for the scene.
This is a picture of me working with the camera and gimbal. It took place midway through our filming process. (Picture taken by Jocy)
We ended up finishing later than expected. While we initially planned to wrap up by 16:00, we finished at 16:20. This was partly because Jasmine had to draw Viola (Rachelle) for the scene, and we also decided to reshoot from multiple angles to capture the best shot and facial expressions. Additionally, I found Jocy's gimbal quite sensitive (it followed even my slightest movements), making it difficult to maintain a consistent camera angle, which further delayed the process. Despite these challenges, we filmed all the scenes we had planned for the day, which was a positive outcome.
Day 4 - 28 January 2025
On this day, we initially planned to film at a beach in Canggu and capture the sunset scenes. However, since all three of us unexpectedly had plans in the evening for Chinese New Year's Eve, we decided to shoot some scenes in the morning as a backup and save the sunset shots for another day. We also opted to change the location to Sanur Beach, as it was more accessible and closer to our homes. Filming in Canggu would have required an additional two hours of travel time due to ongoing heavy traffic, which could have disrupted our schedule. We aimed to arrive by 10.00 but ended up reaching the location around 10.20 due to traffic delays.
Jasmine was the first to arrive. After we all arrived at the same spot, we decided to went ahead to check the place while trying to find areas that isn't too crowded so there wouldn't be much distraction.
At the filming location
Since we arrived later than planned, the weather was already really hot and sunny, as it was nearing midday. Additionally, we didn't have a beach mat, so Rachelle decided to order a drink, which allows us to place our bags and equipment on a table owned by a restaurant.
Jasmine adjusting the camera
After setting up the camera on the tripod, we revisited our storyboard and lyric sheet, discussed which parts of the music video we wanted to film at this location, as well as how we wanted the scenes to be framed and composed. We decided to film the laughing scene at this exact spot to make it look as if the characters (Jasmine and Viola) had just arrived at the beach.
Since Jasmine was acting in the music video, she provided direction on how she wanted her scenes to be framed and which camera angles to use. I adjusted certain aspects of the composition based on her positioning to make the shot look more balanced.
Rachelle trying to find some shells as a prop for the scene.
To enhance audience engagement and strengthen the narrative, we experimented filming with various camera angles and movements at different part of the beach. This allowed us to explore more dynamic visuals and ensure the mise-en-scène effectively conveyed the intended mood and narrative.
Unfortunately, we faced several challenges during filming. Firstly, as the afternoon progressed, the weather became extremely hot, and we had forgotten to bring a mini fan. As a result, the camera repeatedly overheated and shut down, forcing us to pause and cool it down before resuming filming. This caused additional delays and disrupted our production schedule. The intense brightness also made it difficult to review our the result on the camera screen, as the glare of the sun prevented us from properly assessing the visuals. Additionally, the prolonged exposure to the sun led to sunburns, which I experienced for over a week, which is something that should have been accounted for in our risk assessment. Furthermore, after we got home, we realized there had been miscommunication during the filming process. We had used the wrong section of the song, mistakenly recording for the pre-chorus of the first verse instead of the second verse’s pre-chorus. Fortunately, the lyrics were almost identical except for the last part, so the scene is still usable. We also planned to film at a nearby field within the same location to minimize travel. However, due to the extreme heat, we ultimately decided to postpone that scene for another day, to prioritize the well-being of the crew.
Day 5 - 4 February 2025 (written by Jasmine)
After school ended at around 3 p.m., we decided to record a school scene as well as another beach scene for the introduction of the song. This was because we were really lagging behind and had to have some scenes recorded. Beatrice couldn’t come today as she had plans, so Rachelle and I recruited our friend Vina to help us record. We wanted to do a scene that would showcase the deep affection that was held in Jasmine and Viola’s friendship.
(However, we did decide to re-record this scene soon after)
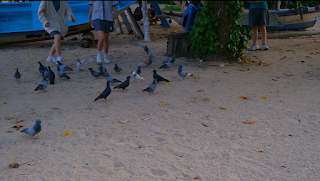
After that, we went to the Sanur beach, however, there was some miscommunication. We got dropped off at the beach, however, it was the wrong part of the beach. We ended up having to walk 30 minutes to our film location with all the heavy equipment, fighting against the time so it wouldn’t be too dark once we had gotten there. When we arrived, we found the pigeons, though!
Once we found the pigeons, we had to somehow make them fly.
To do this, we devised a strategy. First, we lured them in using some dried corn we bought so that they could form a flock.
Once they were together like this, I was told to run along with Rachelle towards the flock in order to make them fly, however, the results were not as satisfying. It took at least 10 attempts to even get them to fly, and once they did fly, they would only fly towards one direction, towards the roof of this structure.
Since we had no way of making them fly in different directions, I just decided that I would mirror some of the footage to make them less uniform in the post-production process.
Another problem I encountered was that my storage space was non-existent. I had to constantly delete other videos to clear up some space for the recording while my battery was dying at the same time. Before the next recording session begun, I made sure to clear up more space in my storage.
Day 6 - 5 February 2025 (written by me)
On this day, we re-filmed the school scenes from the previous day to improve their quality and composition. We scheduled the filming process after class, around 3:20 pm, when all team members were available and had gathered together. We filmed one of the scenes with the help of our friends, Jocy and Cheryl.
Our friend, Jocy, helped us by setting up the camera and adjusting the gimbal.
Jocy and Cheryl also helped us with stabilizing the camera.
Since I was present, I was able to assess the previous scenes and identify areas for improvement. I took on the role of directing, guiding the camera angles, and cueing our friends on when to start and stop recording. Initially, I did not filmthe scenes myself because one of the scenes required a static medium shot, and my hands were really shaky that day. Therefore, to maintain the intended stillness of the frame, we decided it was best for Jocy and Cheryl to handle the filming of that scene.
This was my point of view, as I directed my friends on by guiding them through the filming process and ensuring that each shot aligned with our vision. My teammates and I also reviewed the footage afterward to confirm that we had captured the results we aimed to achieve.
However, I did film an extreme close-up shot of Jasmine and Rachelle’s eyes, which was the part before the medium shot. Additionally, I helped synchronize the playback of the song to make sure that the timing aligned perfectly with the performances. The filming process was efficient and completed in a short amount of time, so there were limited behind-the-scenes photos taken. Despite this, we were satisfied with the outcome and glad that we could wrap up quickly.
Day 7 - 9 February 2025 (written by Jasmine)
My teammate, Rachelle, had bought around 50 small birds from a local market yesterday! We decided to let them go and get it on the recording to simulate a fun activity that friends could do together and show the intimacy of Jasmine and Viola as friends, not only at school but in their personal lives too.
There were already huge issues that arose before we even started recording. Due to the rainy season in Bali, there were times where heavy rain resulted in us being unable to record. During this day, it happened to be heavily rainy in the morning where we wanted to record Renon. My teammate, Rachelle, who lived nearby the location notified us about the heavy rain. Although it would’ve been a safer option to postpone the filming session as the rain could start anytime even after it had stopped, we decided that we had to take the risk, gambling a bit since we were really behind our filming schedule. When we got to the location, the issue became a lot more apparent.
The sky was extremely cloudy which contrasted the vision we wanted to have, where the memory should have been warm and bright.

The grass was littered with puddles of rainwater which would make it hard for me to place my tripod, and it would limit us as we would need to be careful with where we stepped so we wouldn’t accidentally jump into puddles which were sometimes camouflaged and hard to see.
However, we decided to make-do with the situation. After settling down, we decided to record the scene with the birds first so they wouldn’t be too distressed.
An issue that we expected happened, where the birds kept on flying or trying to quickly escape before we planned to release them with our hands, which meant we had to do 13 different takes, which was somehow still possible since we brought 50 birds. However, we still managed to get the shots that we wanted.
Another issue which we had predicted beforehand were the puddles of water. As seen in the picture above, my teammate, Rachelle, was unfortunate enough to accidentally step inside the puddles and get her pants wet. However, this was risky though since we could’ve slipped while running and hurt ourselves.
We also did a scene with us spinning around and holding hands as friends, however since my teammate Beatrice was there, this proved to be a bit of a challenge. While we were spinning it was a bit hard for her to keep up with being out of the camera. Therefore, for a couple of takes we weren’t able to use the footage as she was in the background, running to catch up with the camera.
This was what it looked like in the background.
Therefore, we made a solution. Instead of just running around aimlessly, Beatrice would run close, right behind me, and I would go a bit slower so that it would be impossible for her to be in the frame.
After that, we wrapped up with the filming for that day and went home!
Day 8 - 18 February 2025 (written by me)
We decided to record a scene that would provide context to the overall conflict in the plot of the music video. This included recording a scene where Jasmine would get rejected by the university while Viola got accepted. At first, it took a while for us to discuss and figure out how to convey the conflict properly but after we get a hang of it and understood everyone's vision, we started filming right away.
I (Beatrice) was supposed to act as Viola's other friend. Therefore, Jasmine was the one filming the scene.
It was fairly simple to film, however the only issue was that the actress would frequently break character so we did have to reshoot multiple times. Jasmine directed all the scenes that are filmed today.
We also filmed the scene where Jasmine catches Viola celebrating her university acceptance. This shot was intended to be from Jasmine’s point of view. I helped by directing Rachelle on how to act to make sure that her actions conveyed a sense of panic. Additionally, we filmed Jasmine’s reaction to Viola’s celebration using close-up shot of her face. For this part, I operated the camera while Jasmine guided me on how she wanted the scene to look.
Jasmine discussed with Rachelle how she envisioned Viola’s expression and movement in the scene. , while I (Beatrice) took the behind the scenes pictures.
To illustrate her ideas, Jasmine used Rachelle as an example, demonstrating the desired framing and camera angles.
Although we finished filming later than expected, I'm glad that these scenes turned out great.
Day 9 - 4 March 2025
On this day, we were scheduled to film the scene where Jasmine and Viola look at the university board at school and decide that they want to study in Australia together. This scene takes place before the ones we filmed the previous day. However, since Rachelle was absent, Jasmine and I decided to make use of the time by filming whatever we could. Since I've been noticing that our music video lacked performance-based scenes, we prioritized capturing more of them with the help of our friend, Jocy.
Here is Jocy trying to adjust the camera.
After adjusting the camera, we initially planned to film in the corridor. However, I suggested moving to the other side, away from the corridor, as the sunlight there aligned better with the lyrics “’Til the light leaves my eyes.” I also directed Jocy on where to position the camera to effectively capture Jasmine’s expressions, while Jocy contributed by suggesting additional angles that worked really well. Additionally, I guided Jasmine on how to enhance her performance to make it feel more dramatic.
We didn’t face significant challenges during filming, though we had to reshoot several times due to occasional passersby, as the location was near the school corridor and some teachers were still around. Despite this, we completed filming and focused mainly on refining our vision for the music video. As a result, there weren’t many behind the scenes images taken on this day.
Day 10 - 5 March 2025
Since Rachelle was finally available, we were able to film the scenes we had originally planned for the previous day. We began by filming a shot of Jasmine’s drawing, which symbolizes her excitement about the idea of attending the same university as her best friend, Viola.
Here is the drawing that Jasmine made.
After that scene was done, we placed the university's brochure that we printed on the school's bulletin board. For the hands part of this scene, we're supposed to use a match cut. The process is challenging as we had to make sure that the placement of the hands aligned perfectly with the previous shot. Jocy initially helped film this scene, but she had to go as she had plans and we took too much time filming this scene since we had to re-filmed it multiple times.
We discussed various techniques to make sure the match cut aligned seamlessly with the previous scene.
I eventually took over and managed to capture a shot that worked well enough, so we decided to move forward. This scene was actually suggested by our teacher, Mr. Nick, after we consulted him for feedback that will strengthen our narrative, as we were experiencing a creative block.
This is the note that I (Beatrice) wrote based on our teacher's suggestions.
This is what it turns out to be like.
Following that, we filmed the scene where Jasmine and Viola excitedly look at the bulletin board, as well as a few additional performance scenes. This part of the shoot went smoothly, as it only requires simple camera angles and movements, which allows us to wrap up quickly.
Day 11 - 9 March 2025
Today marks the completion of our filming process. Before we began, Jasmine outlined the remaining scenes that needed to be filmed, drafted ideas, and shared them in our group chat. This greatly helped our filming process, as it allows us to efficiently track our progress and ensure that no scenes were overlooked, without constantly referring back to the music video.
These drafts are made by Jasmine.
I arrived at Rachelle’s house around 4–5 PM. Since Rachelle was still doing her makeup, Jasmine and I decided to film the Q&A segment for our social media page.
This is the setup of the interview. We decided to place the camera on top of the chair to make it stable.
Rachelle took this picture.
Once we completed filming for the Q&A, we moved on to filming the argument scene between Jasmine and Viola, depicting Viola’s departure for university. This scene required multiple takes as the actress found it challenging to portray anger convincingly. However, after several attempts, we successfully captured the intended emotions. I also filmed Jasmine’s individual scene.
Jasmine took charge of filming Viola’s scene, while I adjusted the ring light to enhance the lighting for the scene.
After wrapping up the argument scene, we proceeded to film the final scene, where Jasmine runs after Viola as she prepares to leave in her car. To achieve smooth camera movement, we decided to film from inside a moving car. Rachelle’s driver help us to execute this scene. Initially, we planned to film at Lapangan Renon, but since going there might be time consuming and it was already pretty late, we decided to film outside of Rachelle’s house instead.
I helped by holding the ring light while Devan handled the filming of the running scene.
Jasmine getting ready to run.
We re-filmed this scene several times as we needed to adjust the speed of the car. Additionally, since we were filming in a residential area, passing cars frequently interrupted the process, which forced us to pause and restart. After capturing the running scene, we filmed the moment where Jasmine chases Viola, and the two characters exchange glances from their points of view. Since we all shared a clear vision for this scene, the filming went smoothly. We also recorded another version using a long shot to compare and determine which camera angle best suited the music video’s narrative.
Jasmine captured her character’s point of view shot of Viola.
The main issue we had when we filmed using the long shot version was there were people trying to disrupt the filming process, which we found quite annoying. Furthermore, since the battery on Jasmine’s camera kept on depleting, it requires us to pause and recharge.
Despite these setbacks, the day was a success. Although we had to make last-minute location changes and improvise some scenes, the adjustments led to even better decisions. Most importantly, we were glad that we were able to complete all remaining scenes without delays, officially wrapping up the production process for our music video.
Additional section written by Jasmine. ↓
Digipak and album cover shooting:
This was done very near the deadline as I, Jasmine, had gotten notified that I had to take digipak pictures 2 days before the deadline, which stressed me out a lot as the pictures should have been taken simultaneously while we were filming. Initially, I had planned to do it alone as I didn’t know anyone else who was available to help as my teammate. Beatrice was sick, and Rachelle was busy. Here's a picture I managed to take at home; however, with no direction and being unable to take dynamic pictures, I had to get some help from someone to take my pictures. In a panic, I went out late into the day to Jocelyn’s house, which was more than an hour away.

These are the behind-the-scenes pictures I took once I arrived at Jocelyn’s house.
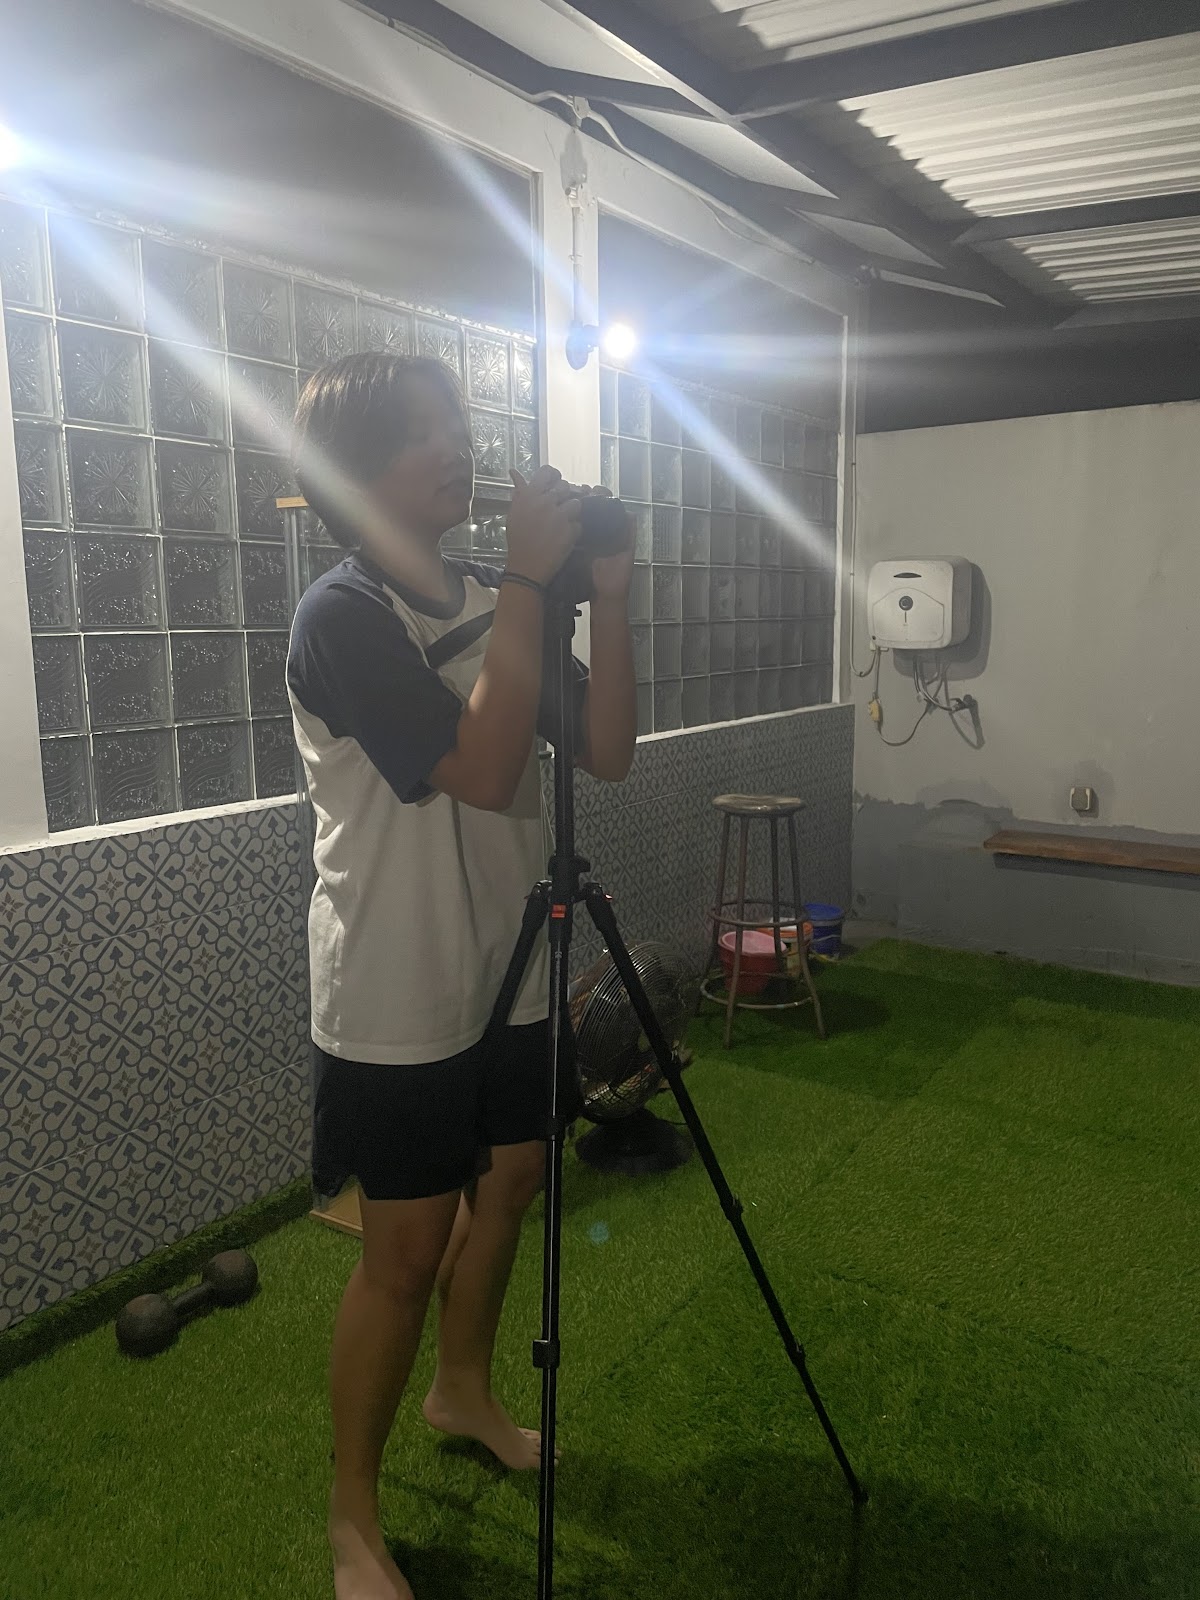
Here is Jocelyn, setting up her equipment to take pictures of me on her rooftop.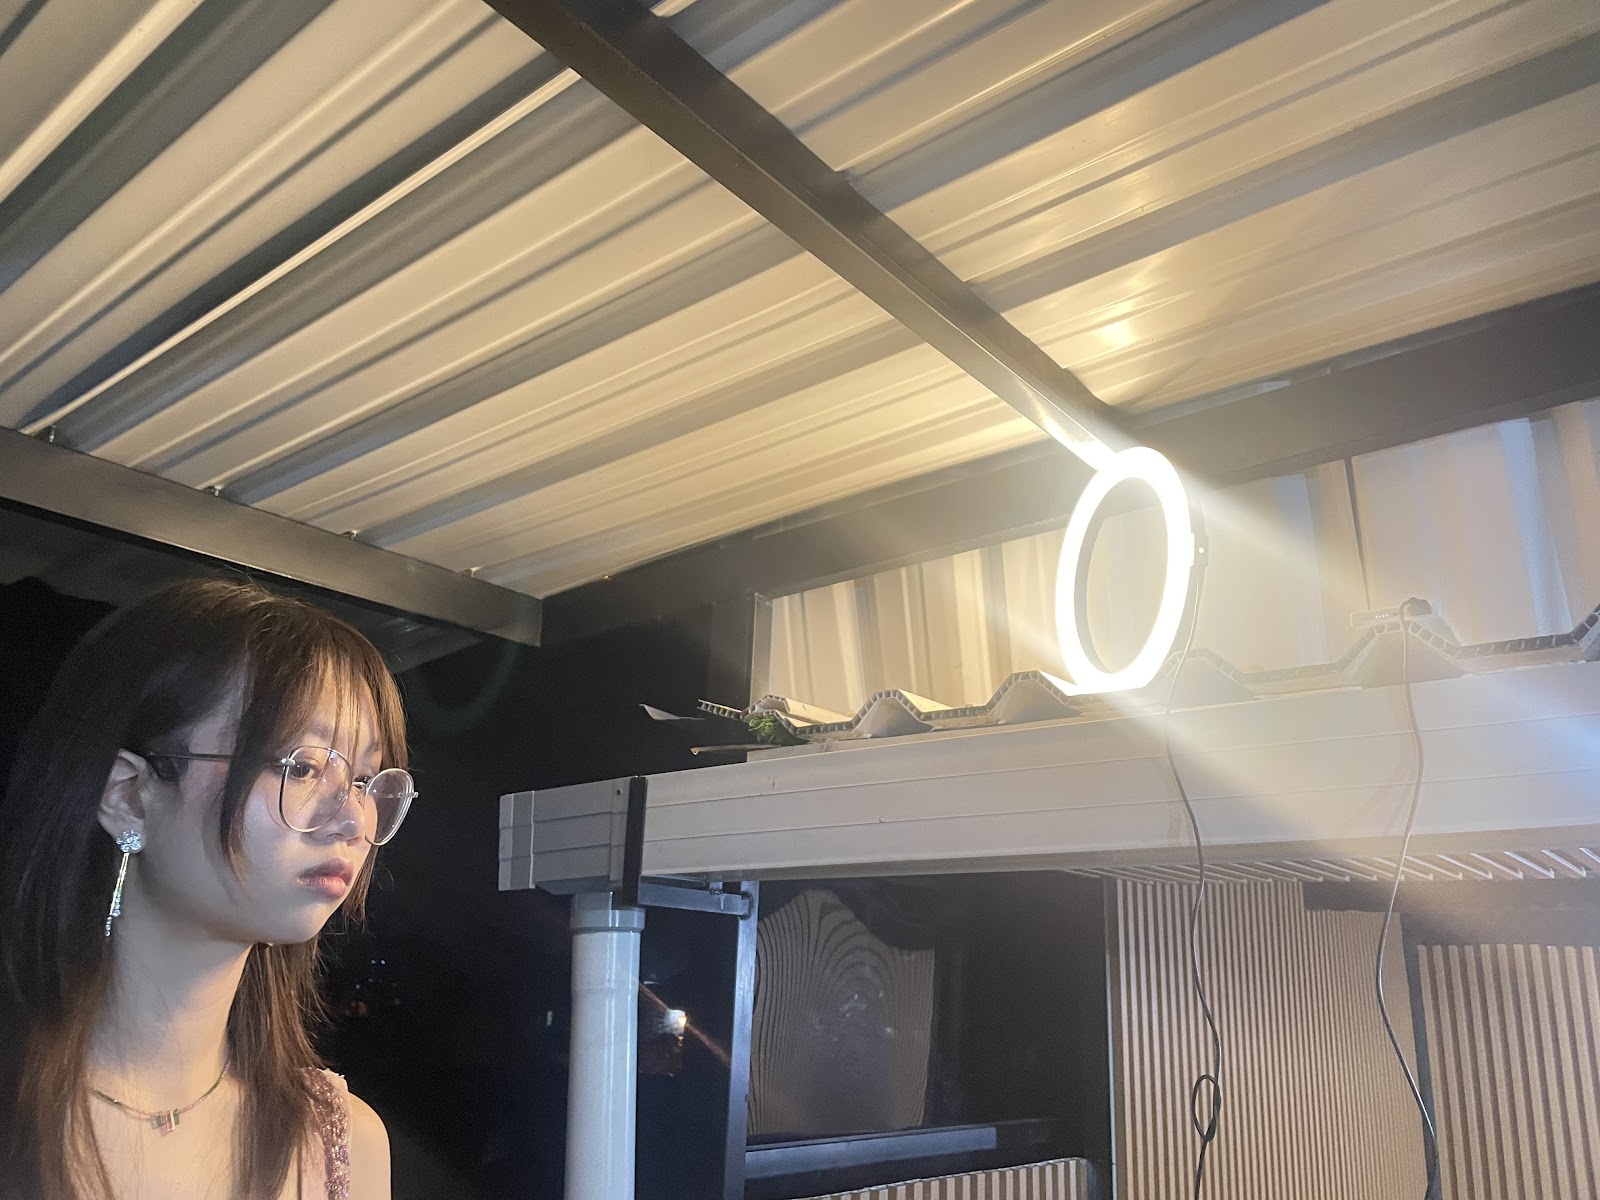
Lighting was a bit hard to set up but it was necessary since it was very dark.
Here is the composition of one of the pictures taken.
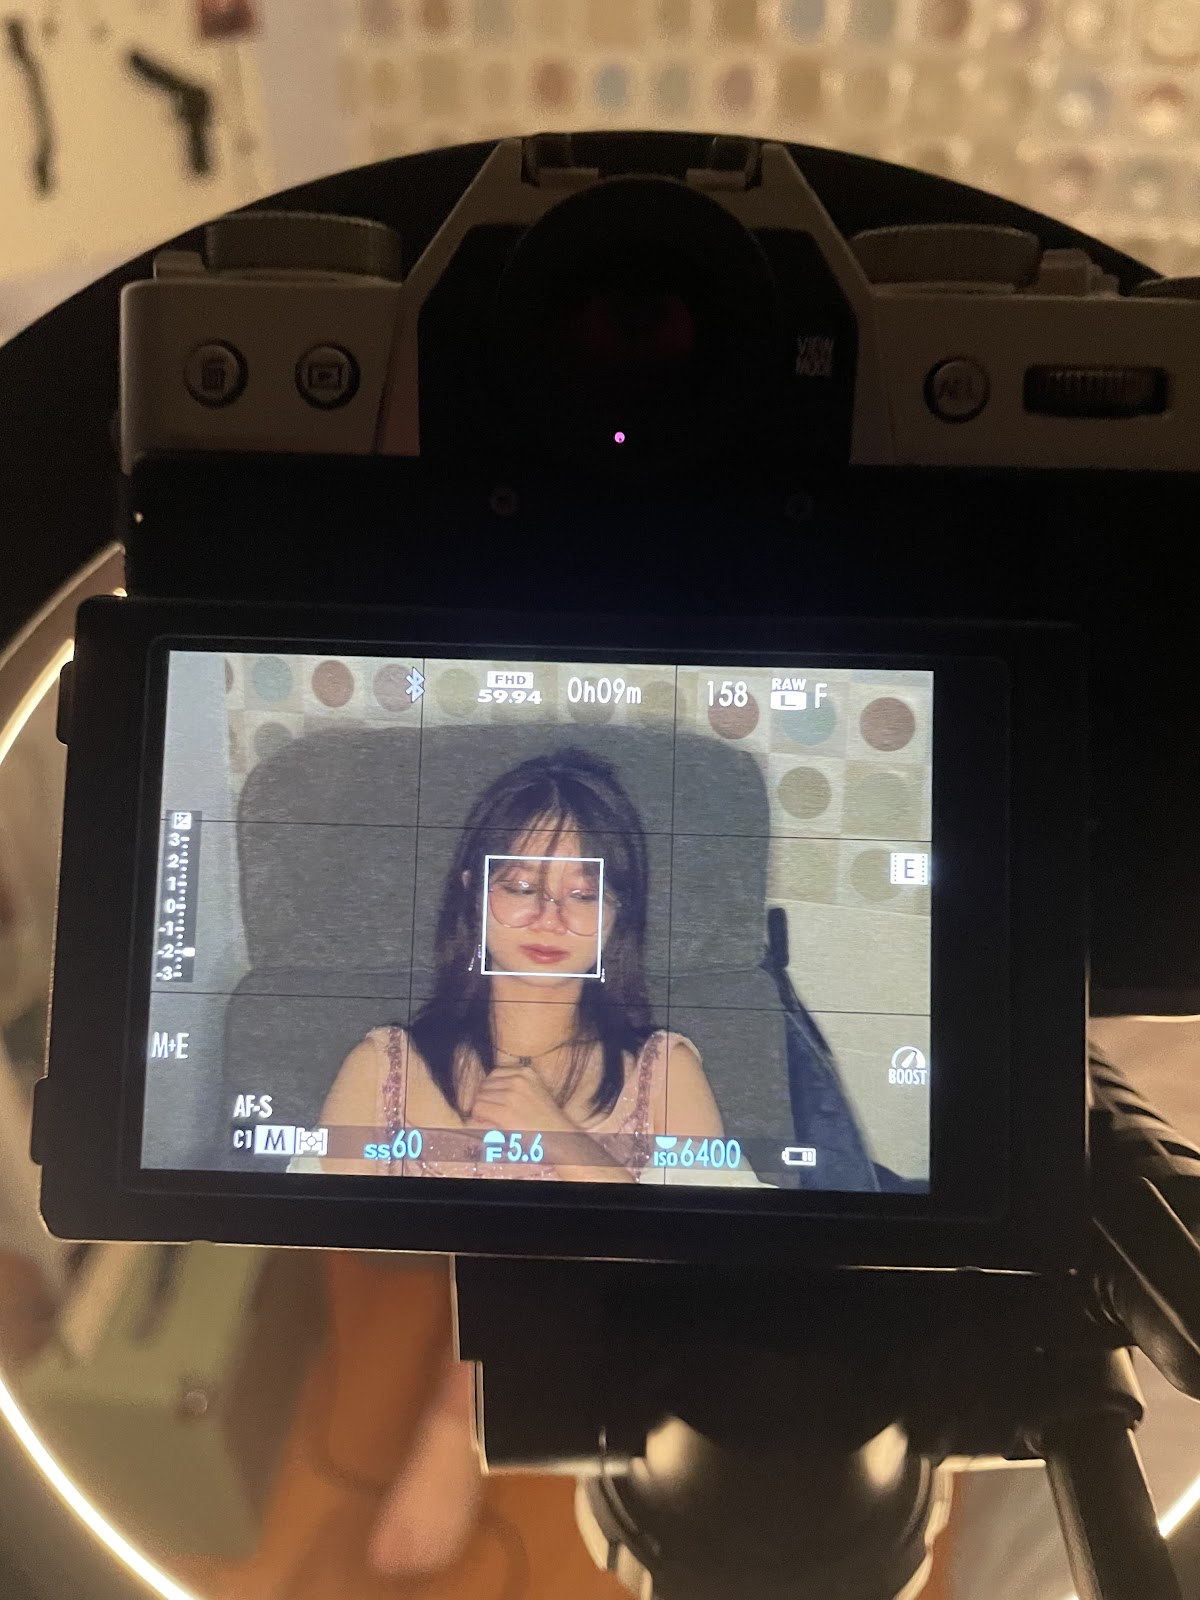
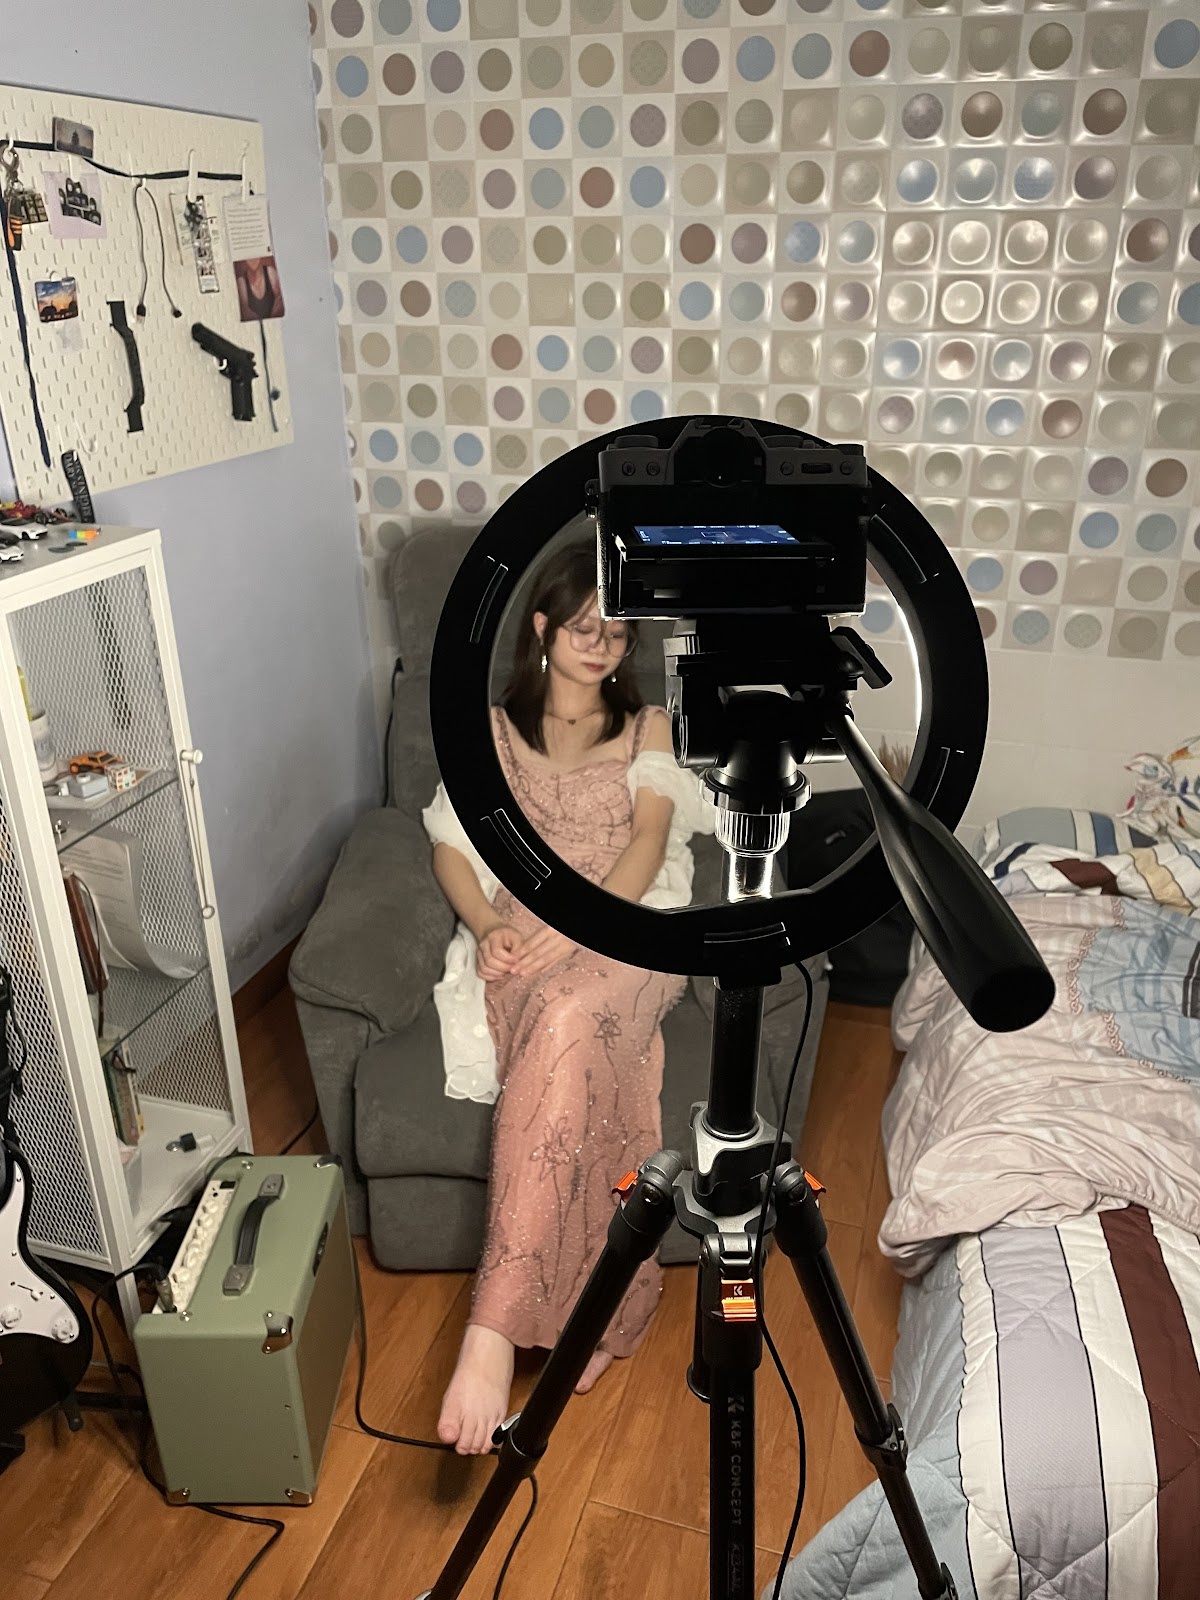
Also tried taking pictures in her bedroom because I wanted to try and use the contrast of the formal clothing which I wore, with the casual bedroom which could potentially connote to the inner child of the artist, even when she is already an adult as the main theme of our digipak and album is nostalgia and reminiscence.
After taking a couple pictures, I had to go home since it was very late and I had school the next day so we didn’t have as many pictures to choose from as I’d hoped.
Reflection : At the start of our production stage, I felt uncertain about how the filming process would unfold, as I wasn’t fully confident in my ideas. Additionally, my lack of experience in handling a camera makes me feel even more pressured, as I worried that the results might not meet my team’s expectations. However, as the production process progressed, I gradually became more comfortable with filming. With guidance from my teammate Jasmine and our friend Jocy, I learned how to operate the camera more effectively. I also become more comfortable in giving feedbacks, contribute ideas, and actively direct my teammates during the filming process. Since my teammates were also acting in the music video, I was also in charge of taking behind the scenes pictures most of the time. Although miscommunication and misunderstanding happen quite often during the production process, I tried my best to help clear things up to prevent any further harm in production, as I don't want it to affect the quality of our final product. Additionally, the extreme weather conditions in Bali forced us to delay the production process for a significant amount of time. This lack of a structured schedule led to a more rushed process than I imagined. I also really dislike having to attend the filming during weekends, especially if it's sudden, as it felt like I didn't have time for myself for two months straight. However despite all of this, I'm glad that we were able to finish filming before the deadline of our project. Looking forward, I believe that implementing a detailed list of scenes to film and a well-organized filming schedule would help prevent last-minute decision-making like this and improve efficiency. Although we managed to complete filming before the deadline, I feel that we could have achieved even better results with a more organized schedule.


.png)




.png)


.png)


.png)

.png)


